Link to Peck Family History on Google Docs:
https://docs.google.com/file/d/0B-1b4l7kg5JCdWxtcDc4R1AwMlk/edit?usp=sharing
Thursday, September 26, 2013

Final Pages of Baby Book Complete

Today I finished my Baby Book project. I'm very happy with the way it turned out. I tried to add as many family stories as I could because those are the things I enjoy most about the old photo albums I look at. This first page is from Summer 1959.

This page is from December 1959 - Grandpa Fuller took the photos of Judy and me in our white dresses with the huge petticoats. It must have been right before or after Christmas at our house.

Here is the final page of my album. I wanted to end on my 6th birthday because 1960 was one of those years full of Big Events in our family. We took our first cross-country vacation to Phoenix, Dad took a new job for General Motors up in Warren, OH and was travelling back and forth for most of the summer, and we moved to Warren that Fall where I started First Grade and then, almost immediately, was moved up to Second Grade.
I'm planning to add a final page of retrospective journaling on the right-hand side of this page.
I may, or may not, make another autobiographical scrapbook album about those years in Warren. However, it's a great feeling of accomplishment to finish this one.
Monday, July 29, 2013
Young Family History - Draft form
Link to Young Family History on Google Docs:
https://docs.google.com/file/d/0B-1b4l7kg5JCZDhFaXBvSEVXYjQ/edit?usp=sharing
https://docs.google.com/file/d/0B-1b4l7kg5JCZDhFaXBvSEVXYjQ/edit?usp=sharing
Family Tree Ahnentafel data
Link to my Ahnentafel report:
https://docs.google.com/file/d/0B-1b4l7kg5JCbTdiT0c4NWlKdms/edit?usp=sharing
https://docs.google.com/file/d/0B-1b4l7kg5JCbTdiT0c4NWlKdms/edit?usp=sharing
Friday, April 5, 2013
Progress on 1959 Slides to Photos

I am partway through the 1959 pages for my album. I have all the photos in the plastic sleeve protectors, and I've picked out the cards to use on all the pages, but I have to write most of the journaling on those cards now.

I added some photos of my Kindergarten schoolwork that I had glued into an old Scrapbook album back in 1960. I also found a photo of my old Elementary School on the internet and included it with my drawing of the school.

I was still in Kindergarten when I started that scrapbook. You can see I have been scrapbooking for a very long time. I made photo collages on PhotoShop and printed them as 6 by 6 pictures on cardstock. I used double-sided 6 by 6 paper for the journaling cards.

One more of the 1959 pages - this was Christmas at our house.
I've decided to add photos up to my birthday in 1960 and then stop for this album. So I'm very close to finishing now. I think I'll keep converting slides, though. At least it would be good to get them catalogued and saved digitally even if I don't decide to print any more for now.
Finished Up to 1958!

I had the next set of slides printed from Persnickety Prints and filed them in my small storage photo books. I had my photos and list of slides by date in front of me, and then I planned out which photos were going to go into which page in the book. I had a few vertical photos that I had printed in both 4 by 6 and 2 by 3 sizes since I wasn't sure where they would fit in the overall pages.

Here you can see the worksheet that I used for planning which page protectors to use and where the photos and journaling cards would go. I am keeping the photos in chronological order as much as possible. A few are hard to date, but I guessed based on clothes, haircuts, and where we were in the photo.

I also took some of the letters that Grandma Fuller saved for me and added them in between the pages where they fit chronologically - or as close as possible. I decided to use the orginals instead of scanning them since they were in a file folder. I used photo corners for most of them, but a few I attached with a tape runner.


I had fun with the journaling cards, adding a lot of embellishments to the cards for Christmas. I used a variety of holiday papers that I bought recently (on sale, of course!) that had cutout sheets of journaling cards, tags, phrases, etc.

I also had some 12 by 12 layouts that I finished when I took an online class from Amy Sorenson called Textuality from Big Picture Classes. I decided to include them chronologically as well. This one of my grandmother reading to me fit right in with a few photos of me reading and another of my Great-Aunt Edith reading to me. I enjoyed making the new page balance with the old - luckily I still had a few of the labels that I used on the older layout. I added other patterned paper that had similar colors.
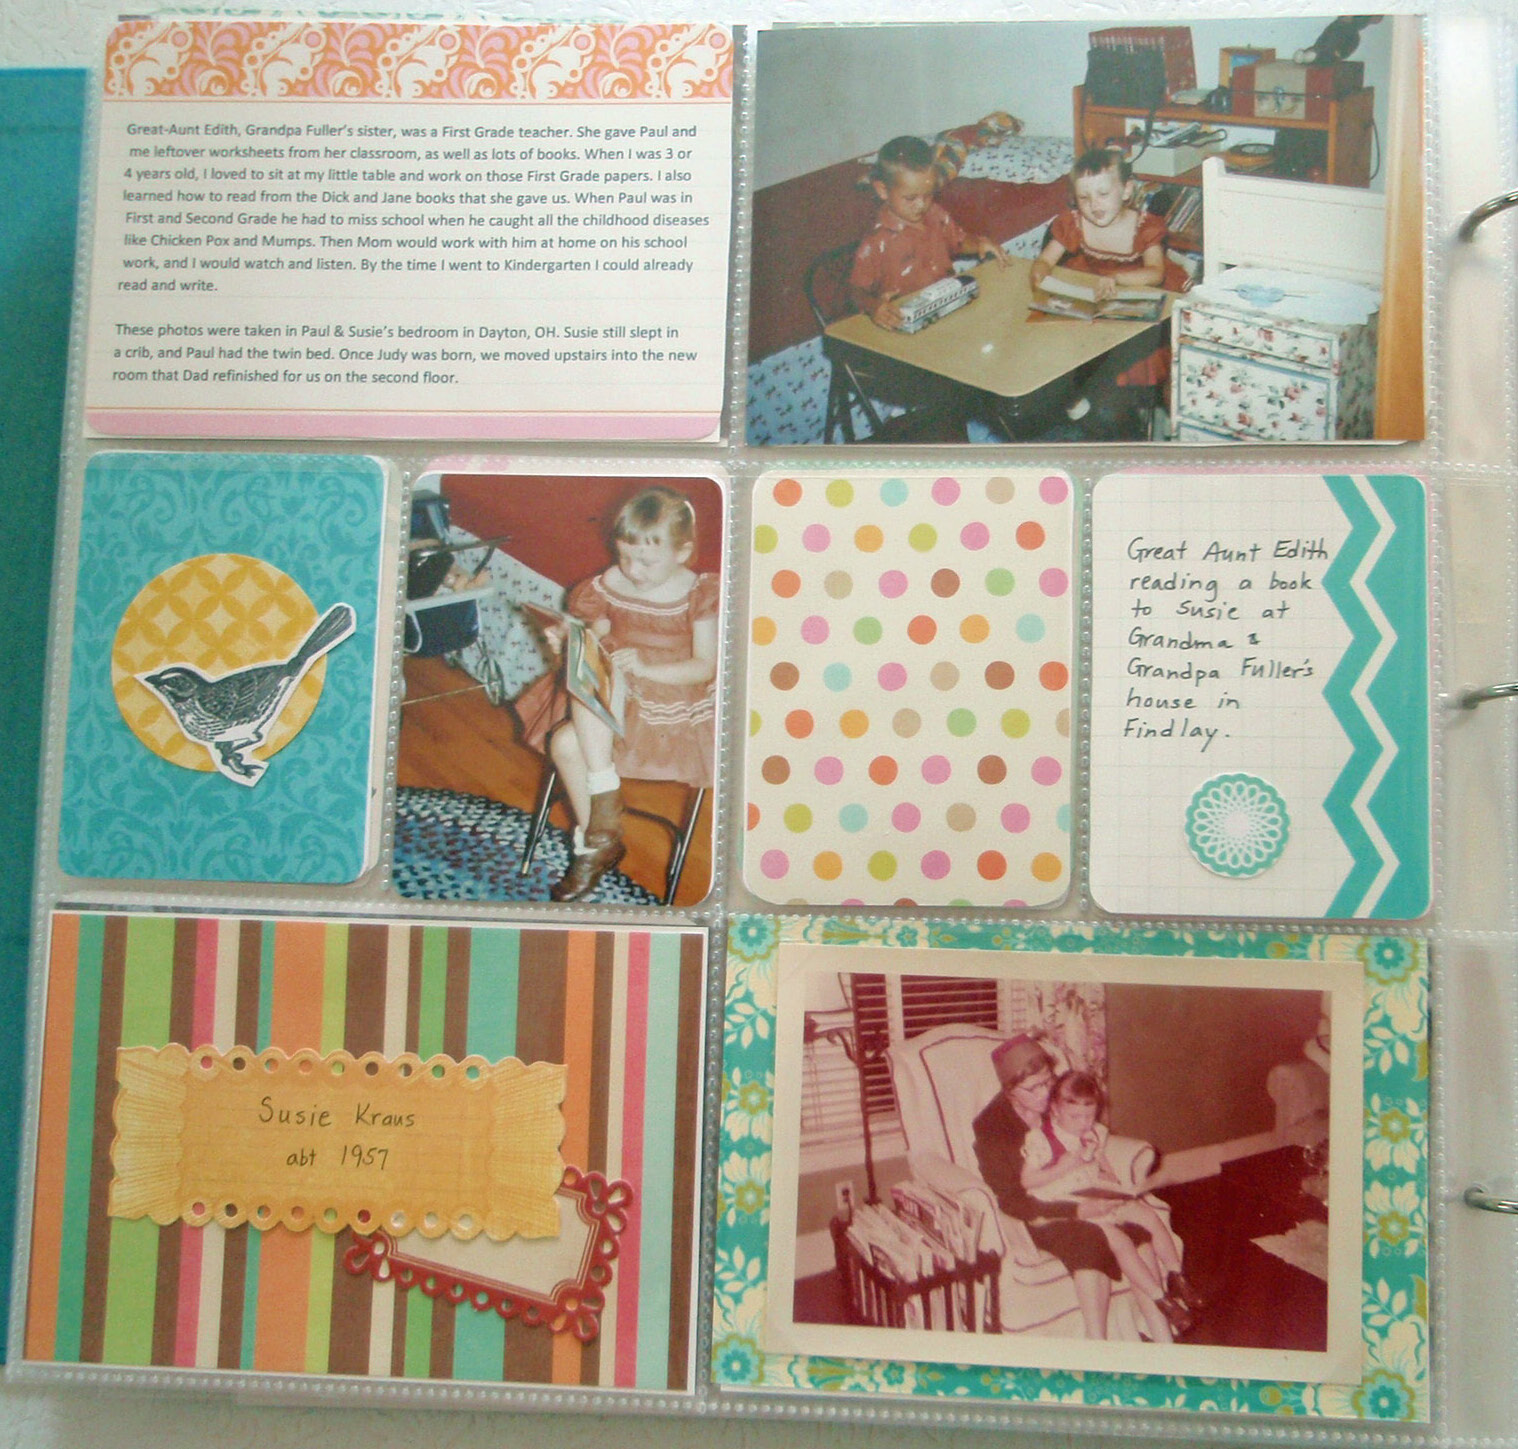
Here is a close-up of the new page. Some of these pages I spend a lot of time on the cards that I add, and other times I just use basic cards that I write my journaling on. I'm lucky to have a lot of time to spend on the project, so I have fun with it. I really like the fact that I can easily move things around if I find a new photo or decide I don't like the way something looks.

I am still sticking with Becky Higgins Project Life Olive Edition cards for most of my pages. I think it helps make the album look more consistent. I just print out cards from the digital version as I need them. Sometimes I type the journaling on the cards before I print them, but most of the time I write the journaling by hand. I know that when I look at old scrapbooks from my mother, grandmothers and even great-grandmothers I like to see their own handwriting.

Here is where I added the last few pages from my original Baby Book (scanned copies) along with one more paper that Grandma Fuller saved. She had written something on the paper about how I wrote the letters of the alphabet and copied my name. It goes along with what my mother wrote on the Baby Book page next to it.
I'm very happy with how this album is turning out, and I'm close to finishing the initial project. If I decide to convert more of the slides, I will have to buy another binder to put them in. This one is just about full now.
Tuesday, February 19, 2013
More Slides from the 1950s
More progress on my Slide to Digital image project this week!

I visited my parents two weeks ago and picked up another big box of slides from the 1950s and 1960s. The first thing I did was to sort the slides by year and jot down the who, what, where and when of each slide.

A few days later I started scanning the slides. I had already decided which groups of slides I wasn't going to bother with due to their poor quality color/exposure and the fact that the subject matter wasn't particularly interesting to me.
I am using the Wolverine Slide and Negative Scanner that I found on Amazon last year. It does a good job of duplicating the quality of the slides and is easy to use. I found that setting up an old slide light table is the easiest way for me to get through the slides and keep track of what I've scanned. I am working on one year at a time on the light table - for the most part I have between 20 and 40 slides per year. Dad and I weeded out the slides that were not of our family before I even brought them home.
Yesterday I got about 130 more slides from 1953-1959 scanned, catalogued, and uploaded to Adobe Photoshop Elements. Here is the setup I'm using - my light table, my slide scanner, and my list of slides to be scanned - along with the box of chronologically sorted slides.
 The scanner is easy to use, but takes some getting used to. You have to put three slides at a time in the tray that feeds through the scanner. Once the tray is closed an pushed into the scanner, you just push the scan button once to get the image, then press the button again to save the photo image to the memory card that is in the scanner. This little black box is plugged into a power strip to run, but doesn't need to be plugged into a computer to scan. I find it much easier to work at my kitchen table than up in the computer room which has very little space to spread out on.

The most time consuming part of the process is on PhotoShop once the images are uploaded. Uploading from the scanner to PhotoShop is simple - I just plug the scanner into the computer via USB cable and use PhotoShop to find the photos on the memory card that I haven't uploaded yet.
Once in PhotoShop Elements, I follow these steps (sometimes in batches):
Here's one of my favorite photos from this batch. My two great-grandmas at our 1957 Christmas party in Ohio.

I already received an e-mail that my prints are done and will be shipping out tonight. Can't wait for the next step of the project - putting them in my scrapbook. It's starting to look pretty good now, and I think I've got all the photos and memorabilia from 1954 - 1957 that I wanted to save in my scrapbook now. Next time I will document how I'm planning my layouts by year.

I visited my parents two weeks ago and picked up another big box of slides from the 1950s and 1960s. The first thing I did was to sort the slides by year and jot down the who, what, where and when of each slide.

A few days later I started scanning the slides. I had already decided which groups of slides I wasn't going to bother with due to their poor quality color/exposure and the fact that the subject matter wasn't particularly interesting to me.
I am using the Wolverine Slide and Negative Scanner that I found on Amazon last year. It does a good job of duplicating the quality of the slides and is easy to use. I found that setting up an old slide light table is the easiest way for me to get through the slides and keep track of what I've scanned. I am working on one year at a time on the light table - for the most part I have between 20 and 40 slides per year. Dad and I weeded out the slides that were not of our family before I even brought them home.
Yesterday I got about 130 more slides from 1953-1959 scanned, catalogued, and uploaded to Adobe Photoshop Elements. Here is the setup I'm using - my light table, my slide scanner, and my list of slides to be scanned - along with the box of chronologically sorted slides.


The middle slide in this photo has to be turned 90 degrees clockwise or counterclockwise to be scanned since the opening on the top of the tray is rectangular. You can rotate the image on the scanner before you save it to the memory card, or I just wait until the image is uploaded to PhotoShop to fix it.
The most time consuming part of the process is on PhotoShop once the images are uploaded. Uploading from the scanner to PhotoShop is simple - I just plug the scanner into the computer via USB cable and use PhotoShop to find the photos on the memory card that I haven't uploaded yet.
Once in PhotoShop Elements, I follow these steps (sometimes in batches):
- I immediately tag them all with a category (for example, Slides 1954_1964) so that they are easy to find later.
- I add a caption to each photo with names, place and a date.
- I use Autocorrect to fix lighting, levels and color on the image - many times this is good enough for the slides that aren't damaged or had bad lighting.
- I set the internal date on each photo based on what I could figure out from the slide - some of them were already written on by my dad or grandpa. Some of them have the date they were developed, although this is not usually the date that they were taken. Sometimes it's over a year later than the original shot date. I can usually figure out from who it is, what we are wearing, where we are, if it's a holiday, the time of year, etc.
- Then I start working on the slides that I want to get prints of right away and decide if they need to be fixed in PhotoShop. I try to get all the dirt and dust particles cleaned up, taking the most time on people's faces and anything that really detracts from looking at the photo. Sometimes I have to fix dark or overexposed photos. Sometimes I crop a little to remove things in the background, but for the most part I want to see the background because it's an important part of the story behind the photo.
Here's one of my favorite photos from this batch. My two great-grandmas at our 1957 Christmas party in Ohio.

I already received an e-mail that my prints are done and will be shipping out tonight. Can't wait for the next step of the project - putting them in my scrapbook. It's starting to look pretty good now, and I think I've got all the photos and memorabilia from 1954 - 1957 that I wanted to save in my scrapbook now. Next time I will document how I'm planning my layouts by year.
Subscribe to:
Posts (Atom)